


Valve caps are small components on vehicles that are often overlooked, but they play a crucial role in keeping valves clean and preventing air leakage. To prolong the lifespan of valve caps and ensure their proper functioning, here are some methods to maintain and clean them:

1. Regular Inspection and Replacement
Regularly inspecting the condition of valve caps is crucial. Check for any wear, cracks, or damage. If you notice any signs of damage or failure, replace them promptly. Regularly replacing valve caps helps ensure effective valve sealing.
2. Cleaning and Dust Prevention
Keeping valve caps clean reduces the accumulation of dust and dirt, thus extending their lifespan. Clean the valve caps gently using warm water and a mild detergent, then dry them with a clean cloth. Avoid using overly harsh cleaners that could damage rubber or plastic components.
3. Use Dust Caps
Installing dust caps is a simple yet effective way to protect valve caps from dust, dirt, and moisture. Dust caps prevent external substances from entering valve caps and reduce their exposure to daily usage and environmental factors.
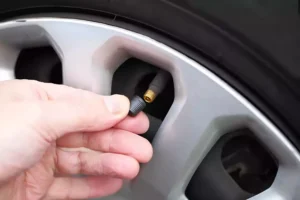
4. Avoid Excessive Torque
When installing or removing valve caps, avoid applying excessive torque. Excessive torque can cause damage or cracking of the valve caps. Use the appropriate tools and tighten valve caps according to the manufacturer’s recommendations.
5. Regular Lubrication
For valve caps that require lubrication, ensure regular lubrication. Use suitable lubricants and apply them to the contact surfaces of the valve caps. This helps reduce friction and wear, maintaining the flexibility and durability of the valve caps.
6. Avoid Extreme Temperatures
Avoid exposing the vehicle to extreme temperatures as both extreme cold and heat can potentially damage valve caps. Whenever possible, park the vehicle in a sheltered area to mitigate the effects of extreme temperatures.
By following these maintenance and cleaning practices, you can ensure the longevity and optimal performance of your valve caps.